

Making : Its in the Cards
- hendrikaono
- Apr 4, 2019
- 4 min read
The Wonders of Washi Tape

Card making has high appeal for me.
I approach them like little paintings so each one feels like a true work of art and the smaller size permits faster production (theoretically J). They lend themselves well to every medium although they will buckle with too much liquid. Because card making is such a versatile topic, I will subdivide it into 2 categories:
The wonders of Washi Tape
Multimedia Card Collage ( a future post)
Part of card making is also making the envelopes and containers for your art cards to store or gift.
Wonderful Washi Tape

Before we can address the actual
card making strategies, it’s useful to take a
closer look at materials.
I trust everyone has heard of washi tape.
This magic material can uplift every object it touches.
And as with so many things in life, more is better.
So if 3 rolls of tape are fun then imagine the joy of many more?
Except abundance brings its own consequences…
Storage :
I have not had great results with the standard available storage units.
I had a wooden unit with a dowel to hang the tape on and a sharp edge for cutting. Ongoing frustration.
Looked a bit like this:

My complaints are as follows;
· Tape “twists” in unit as you try to cut it on the edge, making a clean cut impossible ( for me)
· Have to remove all the tapes on the roll to make a clean cut strip from the selected tape , so why bother with the storage unit in the first place?
There are many creative storage ideas available, which suggests that people who use the materials find the recommended storage units to be ineffective.
Here are two useful ideas.
(look online for more if you like).
Bobbin Holders They come in various sizes
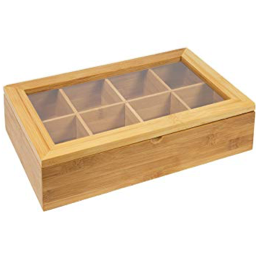
Tea boxes
·Store like colours in groups


We are now armed with some storage strategies
Visual Inventory of Washi Tape Collection

How can you quickly identify which tapes will work well together?
Since you have no control of the hues, you must look carefully to ensure that your chosen colour palate is indeed pleasing.
One approach to make a “table of contents” sheet for your Washi Tape collection.
Materials and Directions
Get a large piece of paper folded into a comfortable size. Group like tape colours together.
Use a small sample of the tape onto your paper.
Try to ensure that you can see as many tapes as possible simultaneously
Design approaches.
Washi tapes are often sold in groups with the outcome that those particular tapes will work harmoniously. For a larger more randomized collection the classic principles of colour theory and pattern play apply.
Basic Colour theory :
Analogous colours
Sit side by side on the colour wheel encouraging peace and calmness. The wavelengths of adjacent colours are close together so the effect colour transitions are smooth and soothing.
Complementary colours
Shout across to each other on the colour wheel. They are the highest contrast, highest energy pairings.
Triads
Musical terms apply for the vibrant result 3 equally spaced colours are combine.
One approach to colour is to “ping pong ” your way through a design. Start with a colour and place a desired 2nd colour beneath it. Weave the 2 colours back and forth. It helps to “ frame” the top and bottom of a card with the same colour for instant balance.
For Example :

Picking 2 or three colours that work well together and weaving them back and forth is usually a very successful approach.

Pattern is the 2nd element that
comes into play with Washi tape.
You can apply some of the same
ideas that we used with colour.
Picking similar patterns will create
a harmonious effect. Diametrically
opposite patterns ( ie flowers versus
plaids is more energetic and potentially
“louder”.
One approach to pattern is to keep
the same thematic pattern elements
throughout the card , ie hearts and flowers.
The pattern is also reinforced with colour
( ie the hearts are red and the predominant colour in the card is red.)
Circles and spirals are helping to hold this pattern together.

Michael’s periodically has huge bins of single washi tape rolls on sale for .50 ea.
Life is expensive : Sales are good.
Just start , it will all unroll before you :)
And now that you have a lively set of handmade cards, with matching envelopes to cheer someone’s day, how can you present them?.
Try making your own large envelope which you can then use to place all the cards together and give ( or sell).
The Envelope Please.

Materials
Card stock , preferably 2 sided pattern
Bone folder
Scissors
Velco or small magnets ( I rarely can find good ones for this)
Foam core
Glue ( I tend to use Modgepodge cause that is what I have a lot of ;)
Binder clips
Light foam or fabric strips
Identify the maximum size and width of the group of cards together. Make a foam core model with the correct dimensions ( took me forever to realize how useful this is.
Fold the card stock paper around the foam core model. Use the bone folder to get crisp edges.
Fold into envelope shape. Trim excess paper Glue
Add velco to the closure flap.
Use binder clips around the envelope (with the foam core form inside) and let dry over night
A Note on using Binder Clips:
I have ruined finished work in the past by using binder clips without placing a light foam ( or fabric) strip between the work and the clip.
The clips often leave indentations in your work.
Sigh… be proactive, have fun , 'til soon.


Comments